-
Shop
- Advanced Technologies
- Best-Sellers
- Car Accessories
- Dating & Social Skills
- Digital Resources
- Budgeting & Saving
- Emotional Intelligence
- Entrepreneurship & Business Growth
- Financial Independence
- Financial Mindset & Psychology
- Goal Setting
- Leadership
- Mindfulness
- Motivation
- Online Business
- Positive Thinking
- Productivity
- Self Confidence
- Sleep Improvement
- Stress Management & Relaxation
- Yoga & Mind-Body Practices
- Education & Learning
- Family & Parenting
- Fashion
- Alexander McQueen
- Bags
- Bags & Wallets
- Balenciaga
- Belts
- Blazers
- Blouses & Shirts
- Bottega Veneta
- Bottoms
- Brunello Cucinelli
- Burberry
- Chanel
- Chloé
- Dior
- Dolce & Gabbana
- Dresses
- Etro
- Fendi
- Gucci
- Jacquemus
- Jewelry
- Jil Sander
- Keychains
- Kiton
- Luggage
- Luggage Bags
- Miu Miu
- Off-White
- Outerwear
- Prada
- Rick Owens
- Saint Laurent
- Shoes
- Socks & Tights
- The Row
- Tom Ford
- Valentino
- Valentino Garavani
- Versace
- Vivienne Westwood
- Fashion Accessories
- Furniture
- Gadgets
- Guess
- Headphones
- Health & Beauty
- Health & Wellness
- Home & Garden
- Home Supplies
- Kids & Babies
- Kitchen
- Kitchen Best-Sellers
- Lighting
- Patio, Lawn & Garden
- Personal Growth
- Pet Care
- Pet Supplies
- Pets
- Sport & Outdoors
- Super Deals
- TikTok Growth & Monetization Mastery
- Travel
- Wealth
- Popular
- Best deals
DIY Faucet Extender: 3 Fast, Kid-Friendly Fixes
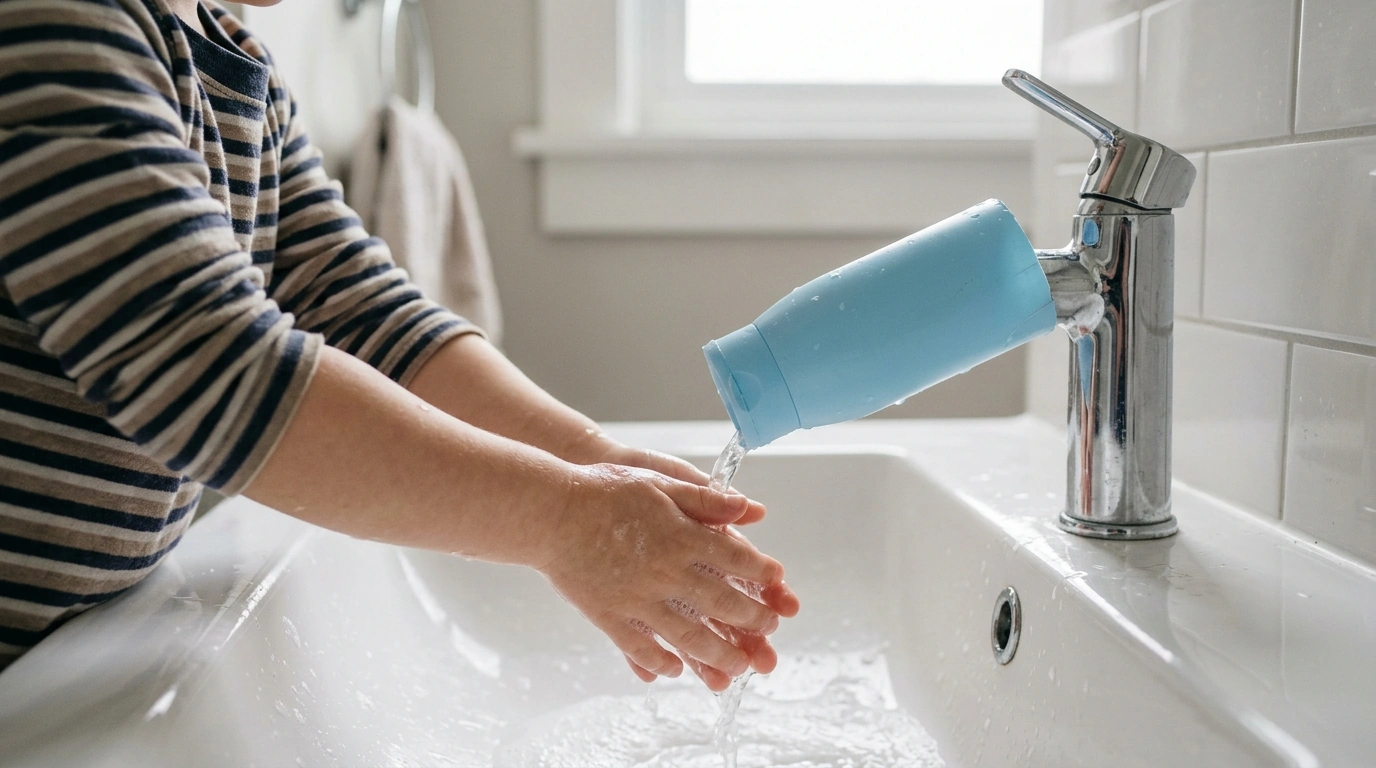
How can I make a DIY faucet extender?
A DIY faucet extender is a simple add-on that brings the water stream closer to the front edge of the sink—handy for kids, shorter sinks, or anyone who wants less splashing. The easiest options use common household materials and take just a few minutes to assemble.
Option 1: Plastic bottle “spout” extender
Rinse an empty plastic bottle (like a water bottle), then cut a curved section from the side to form a shallow channel about 4–6 inches long. Smooth the cut edges with tape (duct tape or waterproof tape works well). Hold the channel under the faucet so it slopes slightly downward toward the sink basin, then secure it to the faucet with additional tape or a snug rubber band. Test with a gentle stream and adjust the angle to guide water where you want it.
Option 2: Silicone or rubber tube extender
If you have a short length of food-safe silicone tubing (or flexible rubber tubing), slide it over the faucet spout if it fits. If it’s loose, wrap the faucet end with a few turns of waterproof tape first to create a tighter seal, then slide the tube on. Aim the tube downward so water flows directly into the sink and doesn’t spray.
Option 3: Spoon-and-tape quick fix
Place a clean spoon under the faucet so the bowl catches the stream and directs it forward. Tape the spoon handle to the faucet base to keep it stable. This works best with low-to-medium flow and is a good temporary solution for brushing teeth or washing small hands.
Safety and cleanup tips
Keep edges smooth to prevent scratches, avoid blocking any faucet aerator vents, and remove the extender daily to dry it out. If tape leaves residue, warm soapy water usually lifts it.
For more DIY approaches and step-by-step guidance, visit https://bizzarshops.com/how-can-i-make-a-diy-faucet-extender/.
FAQ
How do I keep a DIY faucet extender from slipping off?
Dry the faucet first, then use waterproof tape or a snug rubber band/zip tie to add grip. A slight upward wrap at the attachment point helps prevent the extender from sliding forward under water pressure.














Leave a comment